Logical Volume Manager (LVM) provides disk & volume management for the Linux kernel. Follow following steps to attach an additional disk for linux VM:
-
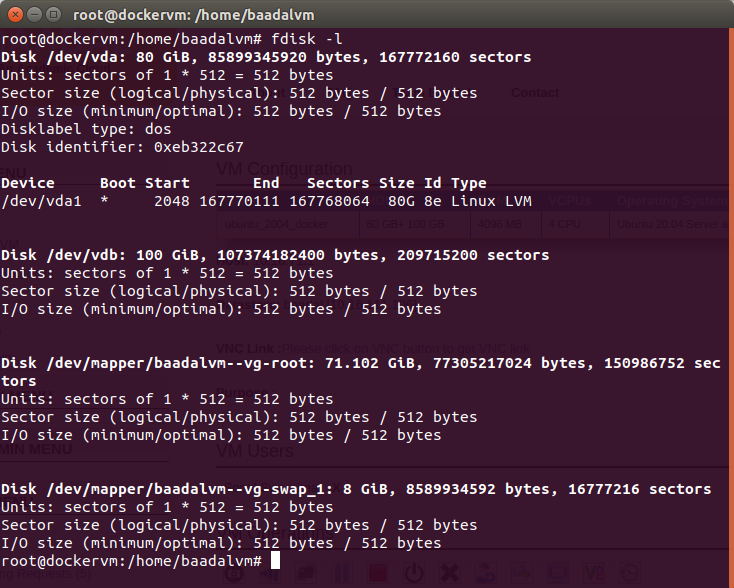
Switch as root user and run fdisk to check whether the new attached disk is detected by Linux on your system.
fdisk -l -
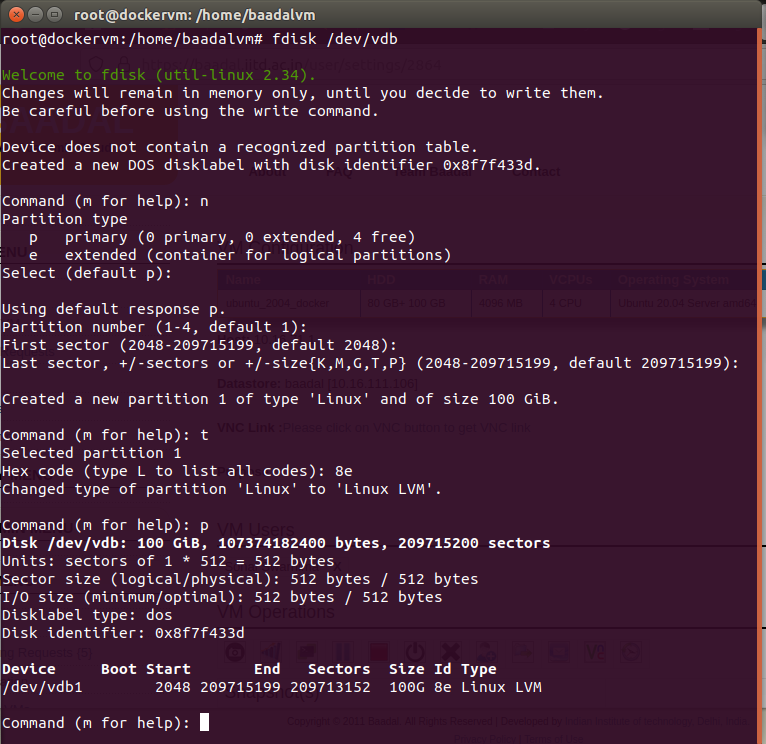
In the above command, we found 2 disks (/dev/vda, /dev/vdb). The 1st disk (/dev/vda) is used by LVM, which shows partitions, while the other disk (/dev/vdb) is not added to LVM, and do not have any partition on the disk. It is advised to create a partition on the new disk before adding them to LVM. Refer to the screenshot for the command and user response to create one single LVM partition of entire disk.
fdisk /dev/vdb -
Use following commands to check the current volumes:
Physical Volume:pvs
Volume Group:vgs
Logical Volume:lvs
-
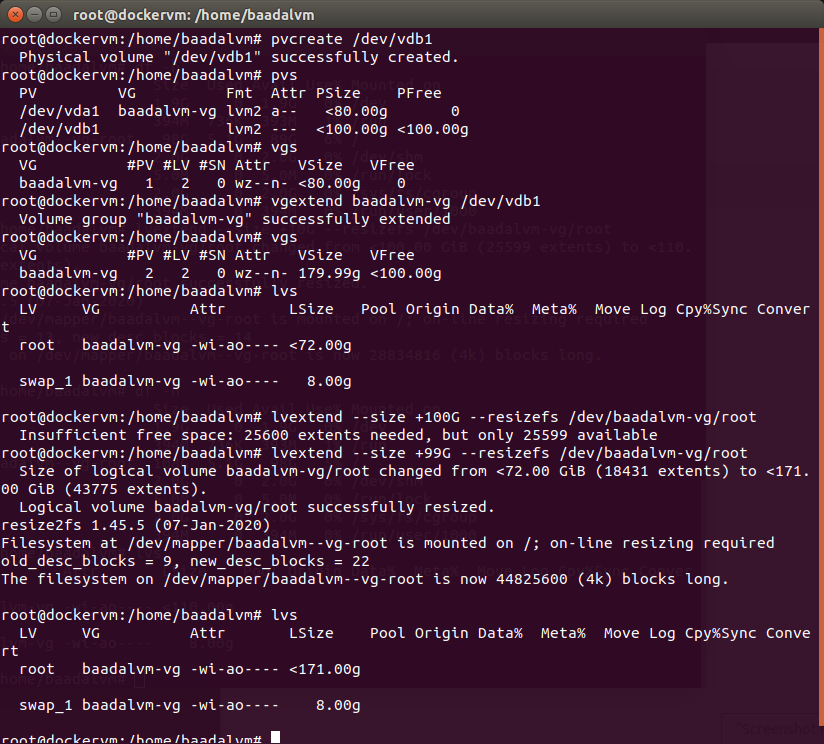
Create the physical volume(/dev/vdb1).
pvcreate /dev/vdb1
-
Next, find the volume group which contains the logical volume to expand, and extend the group by adding newly created physical volumes to it.
In our example, the "root" logical volume belongs to the "baadalvm-vg" volume group. Let’s add /dev/vdb1 to the volume group.(baadalvm-vg)
vgextend baadalvm-vg /dev/vdb1
-
Given the resized volume group, now extend the "root" logical volume itself.
lvextend -l+100%FREE --resizefs /dev/baadalvm-vg/root
Please note: Commands are mentioned only to guide you through the basic process. Do check the name of disk and volumes and modify the command accordingly. You can also choose to add your disk to a seperate volume group or logical volume, and mount it to a seperate directory. Additional information can be looked for on internet. -
df displays the amount of free space on the file system containing each file name argument
df -h